
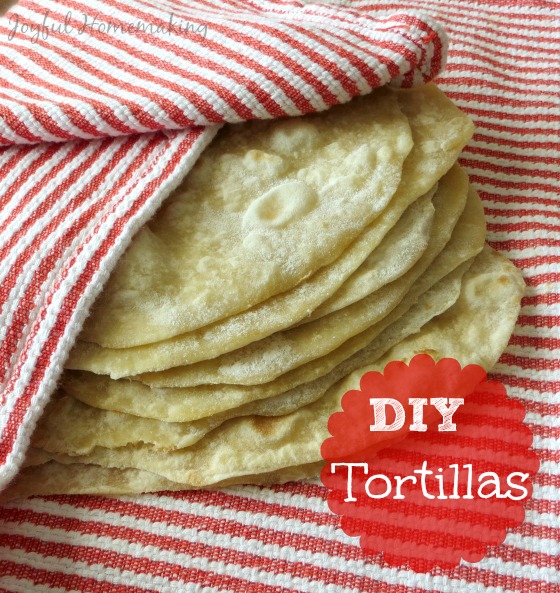
Homemade Tortillas
Have you ever tried making your own tortillas? I must admit, frequently I buy the ready made ones from the grocery store, but when I’ve run out, and don’t want to go to the grocery, I’ve made my own. Every time I do, I wonder why I don’t make them more often, because they are so much tastier and thicker than the store bought ones!
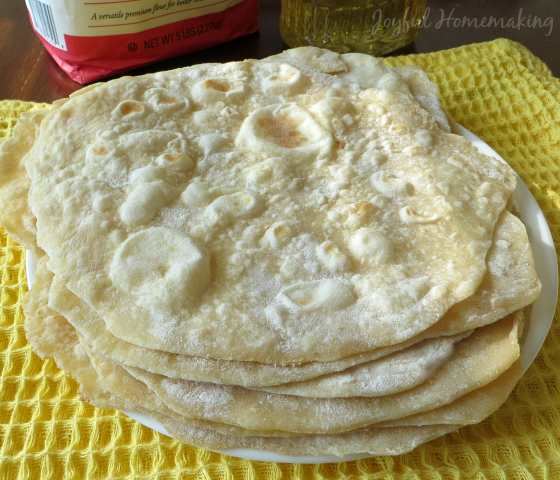
The other benefit of making them at home is that you know exactly what’s in them, and what’s not! Many of the store bought ones are made with shortening, but when you make them at home, you can use oil, which I imagine is healthier.
 These are really simple and fun to make, AND cook.
Here is what you need:
2 1/2 cups flour (I like unbleached)
3/4 teaspoon salt
3/4 cup water
1/4 cup vegetable oil (or olive oil)
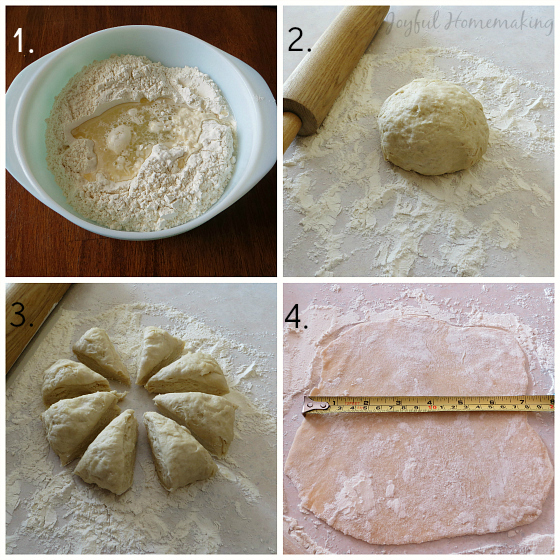
1. Stir together the flour and salt till mixed well, and then add water and oil.
2. Stir with a spoon till a dough starts to form, and then put dough on a floured surface, and knead lightly till you have a nice soft non sticky dough (If you need to, add a dab more flour, but I usually don’t need to). Let it sit for a few minutes while you get your pan ready. Heat up a non stick frying pan on medium to low heat, and I like to give it a quick spray of cooking oil.
3. Cut your dough into eight equal pieces (it helps for measuring to first roll it into a fat circle and then cut).
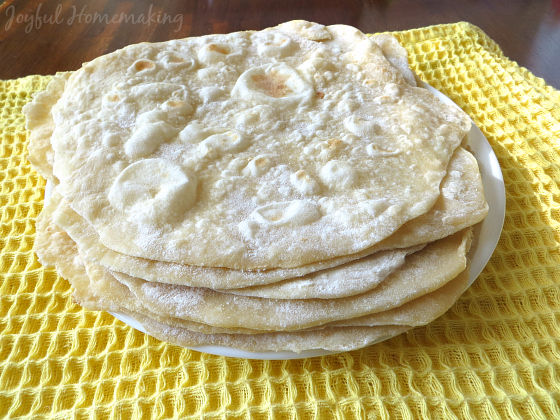
4. Roll out each piece into a 6-8 inch circle about 1/4 inch thick. I like to do them one at a time, and cook one, while I’m rolling out the next one.
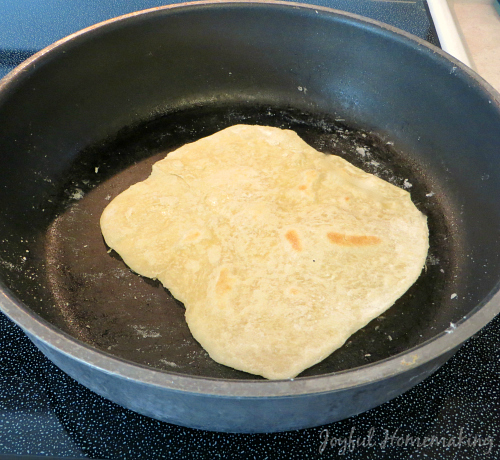 When your pan is nice and warm, lay in one tortilla at a time, and cook for maybe half a minute, or till you see it starting to puff in places. Then flip, and cook for the same amount of time on the other side.
The exact time all depends on how hot your pan is, and what source of heat you’re using, but it doesn’t take long.

I like to stack mine in between paper towels while I’m cooking the rest. I also like to give my pan a quick spray in between every couple of tortillas I cook.
Homemade Tortillas
Ingredients
- 2 1/2 cups flour I like unbleached
- 3/4 teaspoon salt
- 3/4 cup water
- 1/4 cup vegetable oil or olive oil
Instructions
- Stir together the flour and salt till mixed well, and then add water and oil.
- Stir with a spoon till a dough starts to form, and then put dough on a floured surface, and knead lightly till you have a nice soft non sticky dough (If you need to, add a dab more flour, but I usually don’t need to). Let it sit for a few minutes while you get your pan ready. Heat up a non stick frying pan on medium to low heat, and I like to give it a quick spray of cooking oil.
- Cut your dough into eight equal pieces (it helps for measuring to first roll it into a fat circle and then cut).
- Roll out each piece into a 6-8 inch circle about 1/4 inch thick. I like to do them one at a time, and cook one, while I’m rolling out the next one.
- When your pan is nice and warm, lay in one tortilla at a time, and cook for maybe half a minute, or till you see it starting to puff in places. Then flip, and cook for the same amount of time on the other side.
- The exact time all depends on how hot your pan is, and what source of heat you’re using, but it doesn’t take long.
- I like to stack mine in between paper towels while I’m cooking the rest. I also like to give my pan a quick spray in between every couple of tortillas I cook.
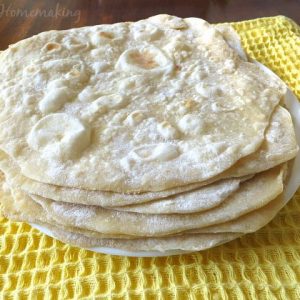
 These are so delicious, that we find ourselves snacking on them the next day, IF we have any leftover!
They may not be as perfectly round as the store bought ones, but they are way more delicious, and work great with your fillings!
Need Help Getting Dinner On The Table???
Get 30 quick and family-friendly dinners with recipes and a ready-made grocery list—making mealtime stress-free and delicious!
These look delicious! I definitely want to try this. We eat tortillas here all the time!
They are so good homemade!