
Mantle Redo
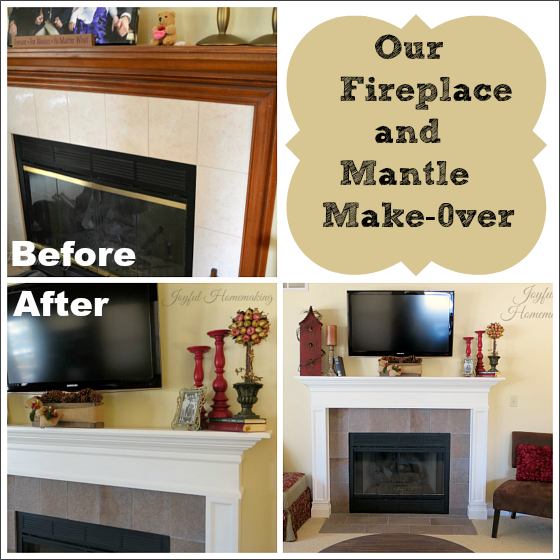
Ever since we bought our home years ago, we have been wanting to redo the peach tile around the fireplace, and the builder grade “blah” mantle, and we finally buckled down last October to tackle it….We always seem to start home projects in October, and after discussing why that was with my hubs, we decided it takes us the first 9 months of the year to get up our courage and motivation to try another renovation project, after our former experiences! 😛
 The old peach tile went so well with the dark green carpet and mauve flowered wallpaper that the house had when we bought it, but it definitely wasn’t our style. 😛 We looked at different options of purchasing a ready made mantle, but decided we didn’t want to wait two weeks for it to come in after ordering (in retrospect that’s laughable), and the costs were around $800 to $1500 for the ones we liked. So my husband took a couple of days off work to build one himself. If you’ve ever seen the DIY channel show “Renovation Realities” you’ll know what I mean when I say we could have been on the show, because our renovation reality took us much longer to complete than we thought it would (two months), and so many trips back to the home improvement store, that my husband was temporarily banned from making any more returns!

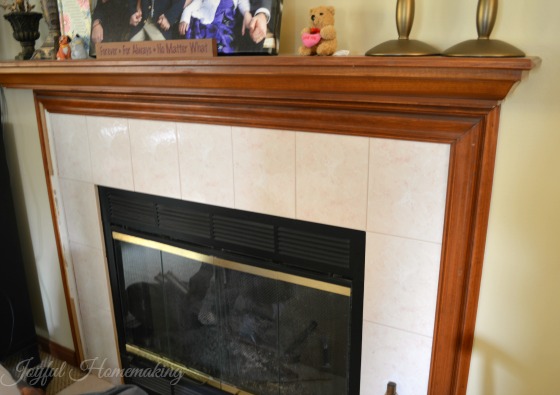
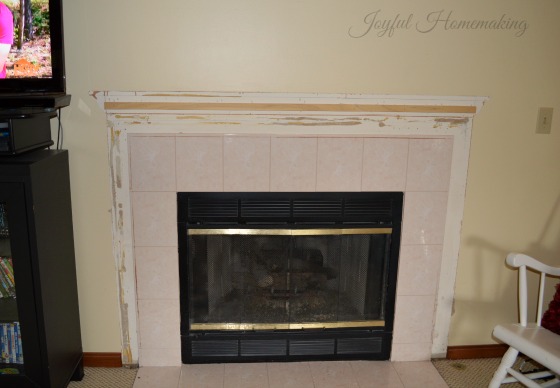
Of course the good blogger that I am, I didn’t get a full on shot of the before fireplace, so I dug up this one from a few Christmas’s ago.
My hubby started by tearing off the wood trim and mantle,
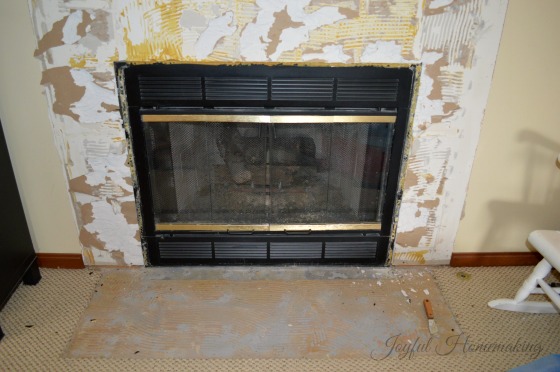 and then removing all of the tiles. I thought it already looked better at this point!
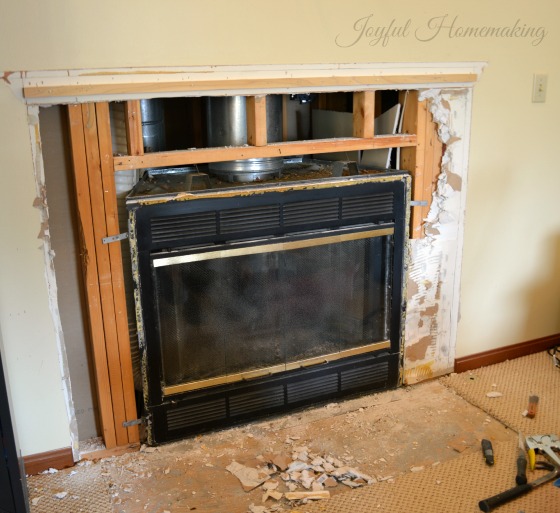 The drywall got damaged during the tile removal, and we wanted to get a better look at what the situation behind the drywall looked like anyway, so we removed it all and redid it.
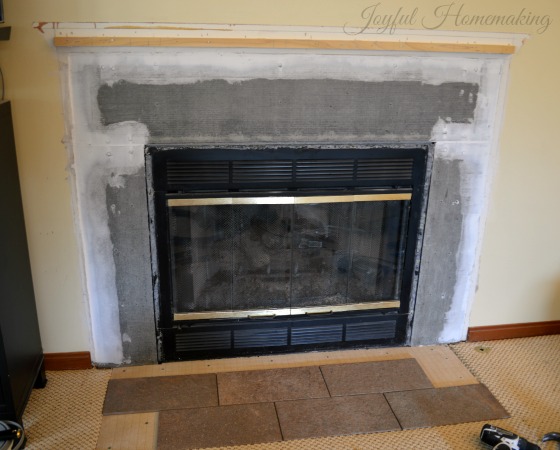
After laying out some tile, we determined the hearth wasn’t level, so we purchased a leveling compound that was kind of tricky and very messy to work with, but did the job.
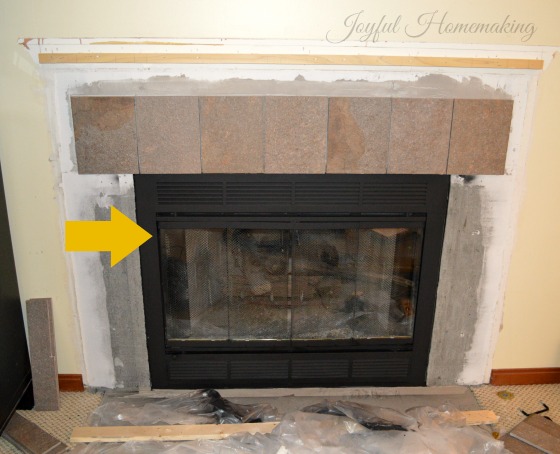 We spray painted the gold trim on the fireplace insert, which was an easy update, and then started the tile process.
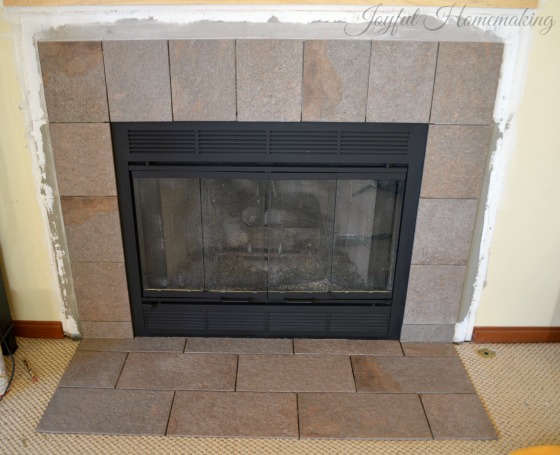
Then came the grouting, which was dark and pretty messy too, but it does tend to dry lighter, and cleans up well.
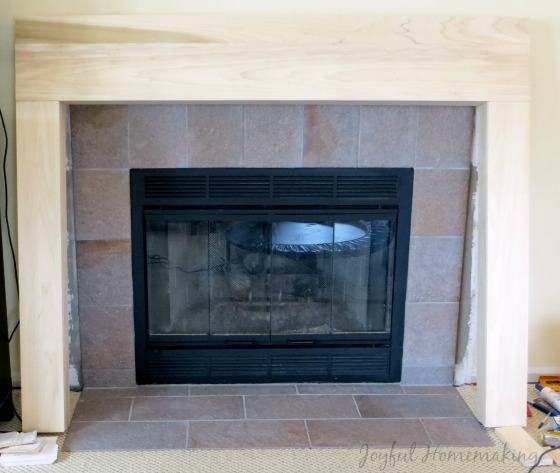
We checked out how-to books from the library, and looked at mantle ideas on Pinterest, and kind of designed our mantle and surround by trial and error. Lots of error…
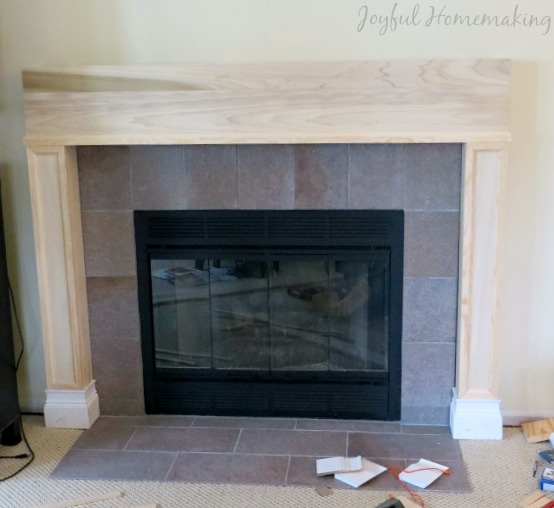
In spite of our mistakes though, it started to take shape, and I so appreciated my husband’s perseverance and determination. By the way, in case you are geometry challenged (his words, not mine), he highly recommends getting a book that gives the angle combinations for mitered cuts for crown molding!
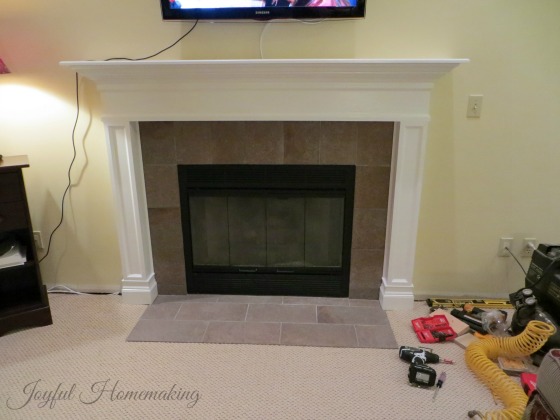
During this process, we also relocated our television to above the fireplace, which I have always wanted to do, to put both “focal” points in the room in the same area, and we both love it.
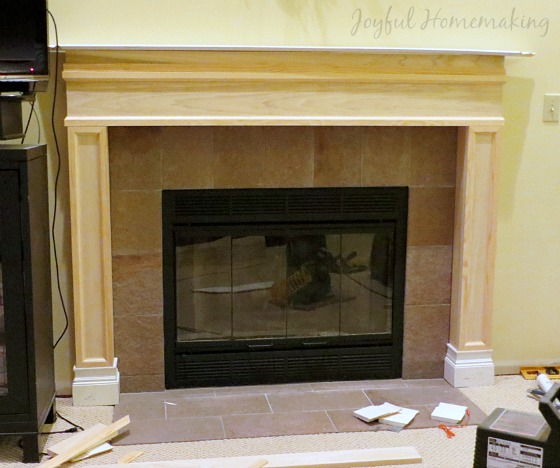
 Before we dealt with the cords, but getting there!
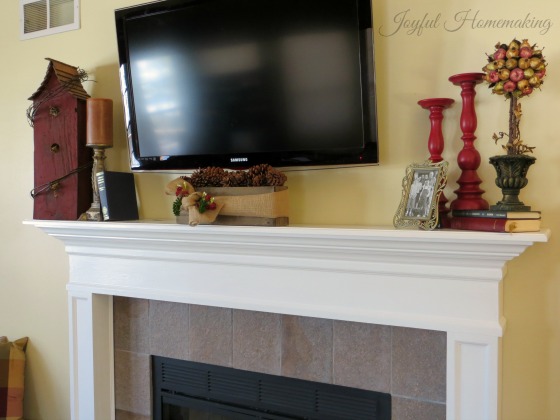
My sister helped me “style” my new mantle, since she is better at that sort of thing than I am. 😛
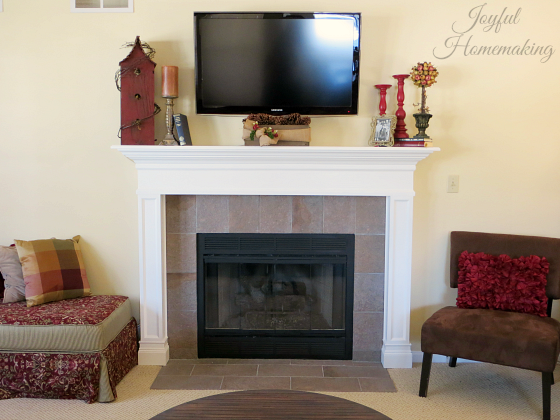 Even though it took a couple of months to finish our project, we are both very pleased with how it turned out! My hubby estimates that with the additional tools he had to buy, and all the supplies, we spent around $300-$350, although I suspect maybe a bit more if we took the time to add everything up. I really love it though, as it gives a whole new brighter and more updated look to our living room.
 While my husband was working on this project, I was working on re-staining our kitchen cabinets, which I hope to show you soon in an upcoming post. We love how they turned out as well!
Need Help Getting Dinner On The Table???
Get 30 quick and family-friendly dinners with recipes and a ready-made grocery list—making mealtime stress-free and delicious!

This looks amazing! You’re so skilled! We used to have a really retro fireplace but thankfully it got pulled down completely after an earthquake, so now there is a big gap where we have put the TV {so perfect since our living room is quite small}. But, I so miss having a fireplace – it adds so much character and warmth and happy memories!
Thank you! We are so happy with it, and love playing games in front of it on cold evenings. I visited your blog, and was so encouraged by your testimony!